VStitcher & Substance 3D Workshop: Redefining 3D Asset Creation
This workshop explore the integration of Substance 3D Designer and Substance 3D Sampler, offering an exploration of workflows for apparel designers.
November 5, 2021

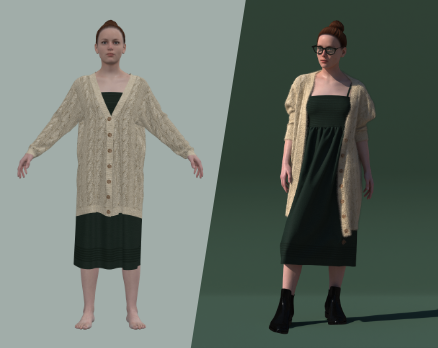
Whether you’re showcasing collections to buyers or holding an internal review session when working with 3D design software for fashion, you’ll want your 3D garments to look as lifelike as possible, so you can ensure that what you see is what you get when producing the physical piece. To help you achieve that ultra-realistic result you’re looking for, we’ve got some useful tips and tricks up our sleeve that can make all the difference in just a few simple steps.
Unbutton the garment for a more natural, laid-back look
If your garment is buttoned all the way up, it can sometimes end up looking a little stiff, which could affect its level of realism. Therefore, we suggest that when showcasing a garment, you leave a section of the garment’s fastening unzipped or unbuttoned. That way, you will be able to visualize any of the bends and creases around the fastening, as well as the layers beneath it.
Add thickness to the material and double the fabric physics
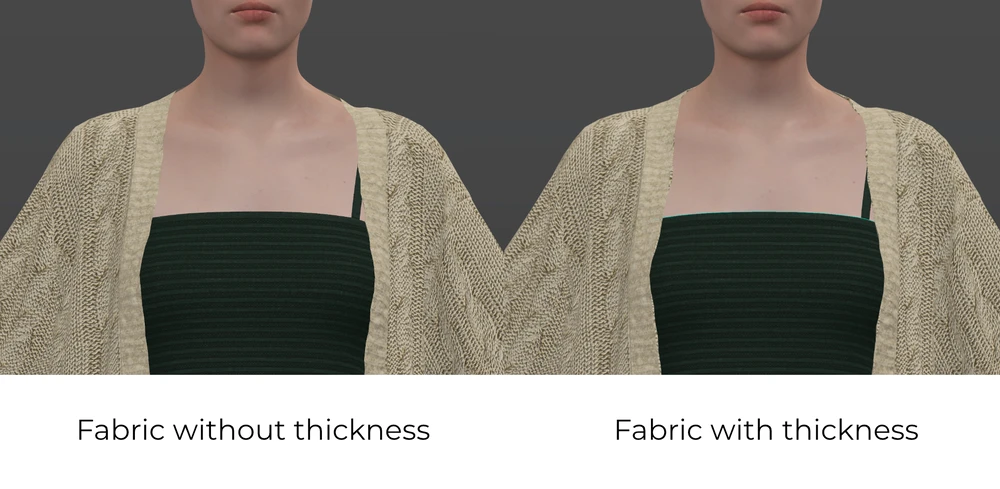
When working with fabrics that have very little thickness, you may end up with a garment that looks more 2D than 3D. If that’s the case, it’s important to increase the thickness of your fabric. This can be done by editing the physics of the fabric that you are working with. These changes are particularly visible on the hemlines. To mimic the two-layer workmanship on pattern pieces such as collars or cuffs double the fabric physics instead of stitching two patterns together. To change the fabric’s thickness, go to the Context View and click on the Physics button at the top. In the pop-up window, focus on the Thickness tab. In this example, we’re setting a flat knit so the thickness should be around 3mm. Note that if you use a U3M fabric file, you can rely on the accurately measured physics of the file and you don’t necessarily have to change the thickness unless you want to customize the fabric.

Lower the grid
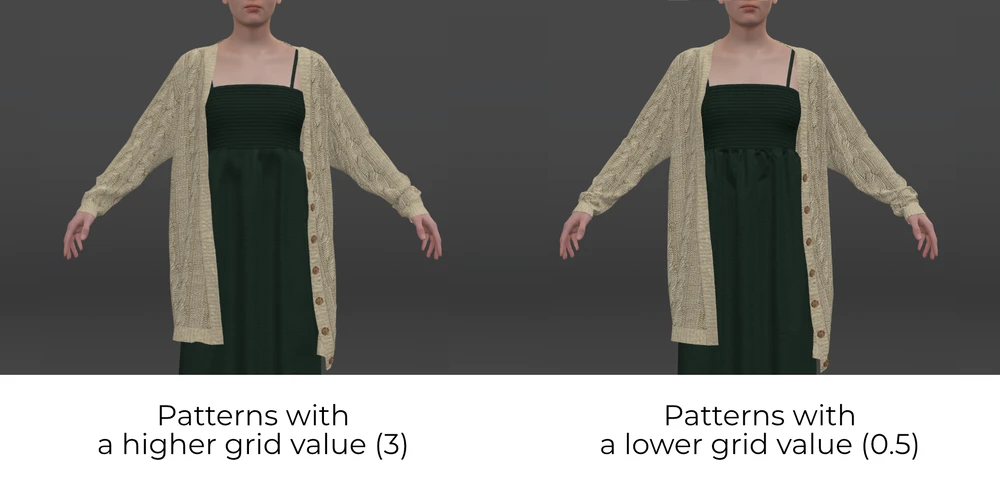
Another way to make your fabrics look more realistic is by lowering the grid. The grid number influences how smooth the garment will look. By default the grid value is set to 1, the minimum value is 0.1 and the maximum is 4. The lower you go the more natural and detailed draping and folding your garment will have. To better imagine how to work with the grid value, think of the number as the scale of the grid which is unique for each pattern piece. A smaller grid provides smooth transitions and details, a larger grid takes less of your computer performance. It’s important to find a balance and set each pattern piece according to its specific needs.

Strengthen the edges of your fabric and assign seam groups to your garment
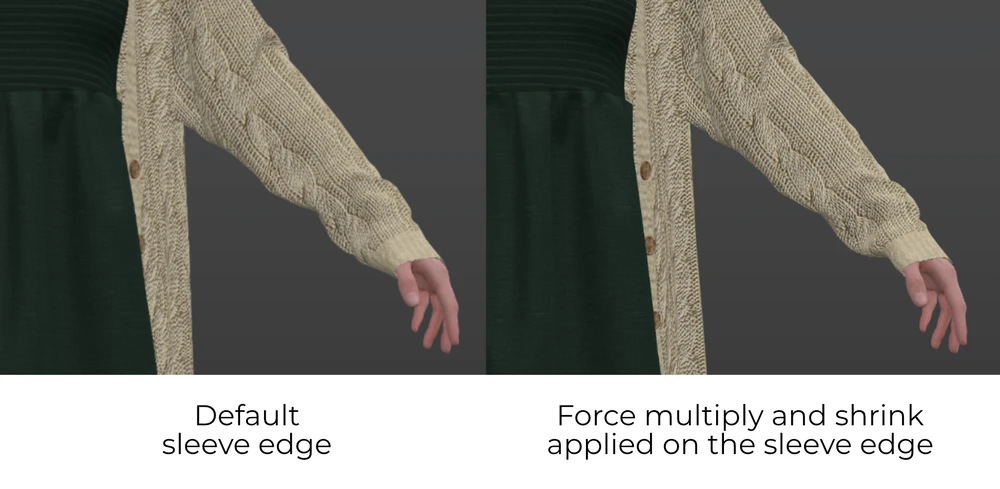
A great way to add depth to your garment is to strengthen the hems using the Force Multiply tool. This tool works to mimic the multiplied physical properties of rolled hems and other similar edges. Additionally, rather than using a basic seam, it’s also a good idea to add some shadowing or abrasions to it for a more realistic look.

Avoid using a default pose
We would recommend keeping away from using the A-pose when conducting garment presentations. Although the default pose can be useful when drafting initial concepts, our selection of pre-made poses such as an active or more relaxed stance, or the ability to create your own custom pose will give you more professional results, and showcase your garment to its full potential.
Leverage the Styling tool
The styling tool comes in handy when unbuttoning your garment or experimenting with different poses. In reality, all of us spend time styling our outfits, whether it’s rolling our sleeves up, tucking in our shirts, or creating a cuff at the bottom of our pants. When using the styling tool, you can do all of this in 3D, and ultimately have more control over your outfit to make it look as lifelike as possible.
Enable and set fur properties (with V-Ray only)
If you’re working with knit fabrics, you’ll want to make them look even more realistic by setting the fur properties – you’d be surprised as to what a difference it makes! Remember, the fur properties are not limited to fluffy fabrics, you can apply fur properties to fleece, flat knits, and more, to give your fabrics a little more depth, making the threads on the surface even more visible.
Accessorize your outfit
Let’s be honest, no outfit is ever complete without some accessories to complement it. Adding shoes to your avatar is a must, as well as other 3D trims such as bracelets or a belt, or a chic pair of glasses, to really make your design stand out and give it a less artificial look. To learn more about accessorizing your look, check out our two-part video tutorial. Want to try it yourself? Download the women’s glasses to get started.
Choose a captivating HDRI to create unique lighting and shadows
Whether you’re a swimwear or eveningwear designer, it’s important to choose an HDRI that best fits your design concept. That way, you can ensure that you create the right atmosphere for your final render. You can seamlessly exper the exposure value and the rotation of the HDRI to get the right lighting and shadowing to ultimately add more depth and realism to the image.
Interested in learning more tips and tricks to help you achieve optimal results when working with your 3D apparel software for fashion design? Check out our latest video tutorials. Or, to put these tips into practice:
Download the .BW file hereThis workshop explore the integration of Substance 3D Designer and Substance 3D Sampler, offering an exploration of workflows for apparel designers.
In this tutorial, we'll walk you through various workflows to create your own stunning Substance 3D artworks.
Discover 1930s sleeve design with Browzwear's 3D fashion tools. Learn vintage-inspired techniques in our Garden Party digital workshop.